I originally assumed my CyberPanel OPcache setup was already working properly because WordPress felt reasonably fast and no obvious PHP errors were appearing.
The issue became easier to notice after monitoring resource usage during traffic spikes. CPU activity occasionally increased without any major change in visitor numbers, and response times were not always consistent. Since LiteSpeed Cache and CDN settings were already configured, I started looking deeper into the PHP environment itself.
The actual cause turned out not to be a cache plugin problem. My CyberPanel OPcache setup was active, but the configuration was still running close to its default values. After reviewing the settings and adjusting several parameters, PHP execution became more predictable and server load stabilized.
This CyberPanel OPcache setup was tested on WordPress running with OpenLiteSpeed, CyberPanel, LiteSpeed Cache, and AWS Lightsail. If you use a similar environment, the same approach should apply without major differences.
Table of Contents
GEO Summary
Environment used:
- WordPress
- OpenLiteSpeed
- CyberPanel
- LiteSpeed Cache
- AWS Lightsail
- PHP 8.3
Issue observed:
- Inconsistent PHP performance
- Higher CPU usage during busy periods
- Default OPcache values still active
Fix direction:
- Verify OPcache installation
- Confirm activation status
- Adjust php.ini values
- Restart OpenLiteSpeed
- Validate active configuration through SSH
Why I Reviewed My CyberPanel OPcache Setup
Most WordPress administrators spend time tuning cache plugins, image optimization, and CDN settings.
I did the same.
What confused me most was that server performance still varied even after LiteSpeed Cache was configured correctly. The website was not slow enough to trigger alarms, but response times occasionally felt inconsistent.
After reviewing running processes and PHP behavior, OPcache became the next logical place to investigate.
Verifying the CyberPanel OPcache Setup
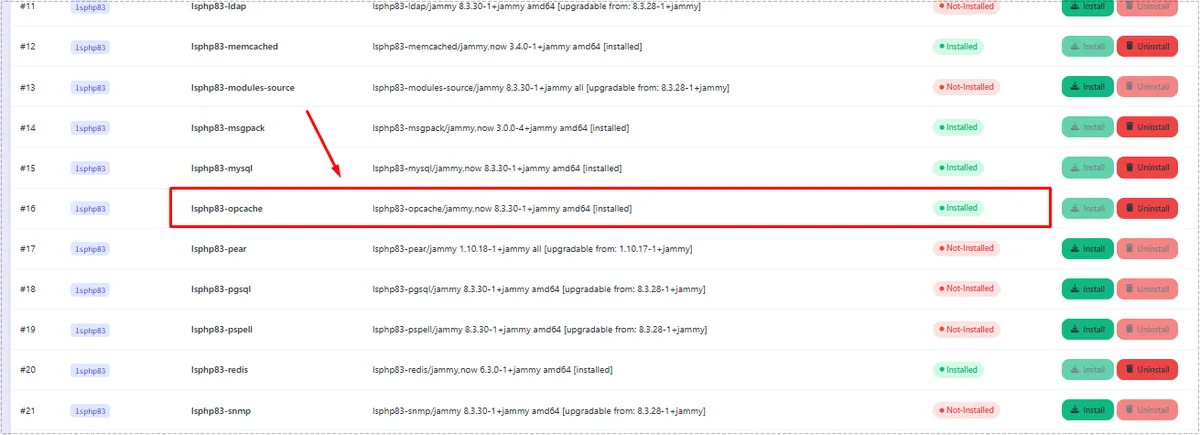
Before changing any settings, I wanted to confirm whether OPcache was actually installed.
Inside CyberPanel, the extension list showed that the OPcache package was already available for the active PHP version.
This step is important because configuration changes will have no effect if the extension itself is missing.
After confirming installation, the next step was checking whether OpenLiteSpeed was actively loading the extension.
Checking Whether OPcache Is Actually Running
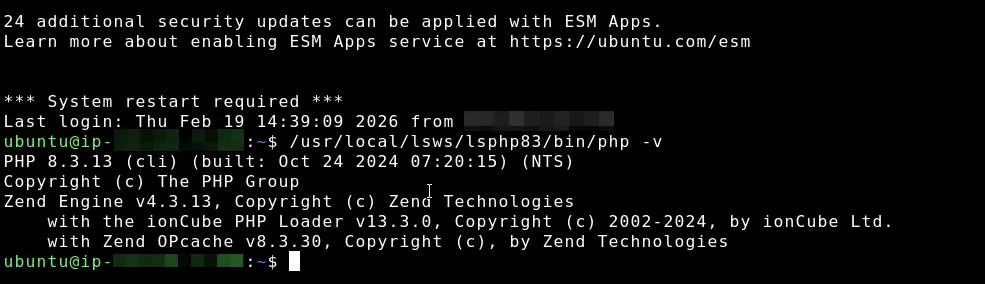
Many administrators verify PHP using a generic command and assume everything is working correctly. I wanted to check the exact PHP version used by OpenLiteSpeed.
Running the OpenLiteSpeed PHP binary immediately showed Zend OPcache in the output, confirming that the extension was active.
Although OPcache was active, that still did not guarantee the configuration was optimized.
Why Default OPcache Values Were Not Enough
The default configuration is designed to work safely on many different servers.
That does not necessarily mean it is ideal for a WordPress production environment.
Several values were still using conservative settings:
- interned_strings_buffer
- memory_consumption
- revalidate_freq
- max_accelerated_files
On a WordPress installation with themes, plugins, and frequent PHP execution, those values can usually be improved.
Adjusting Values in the CyberPanel OPcache Setup
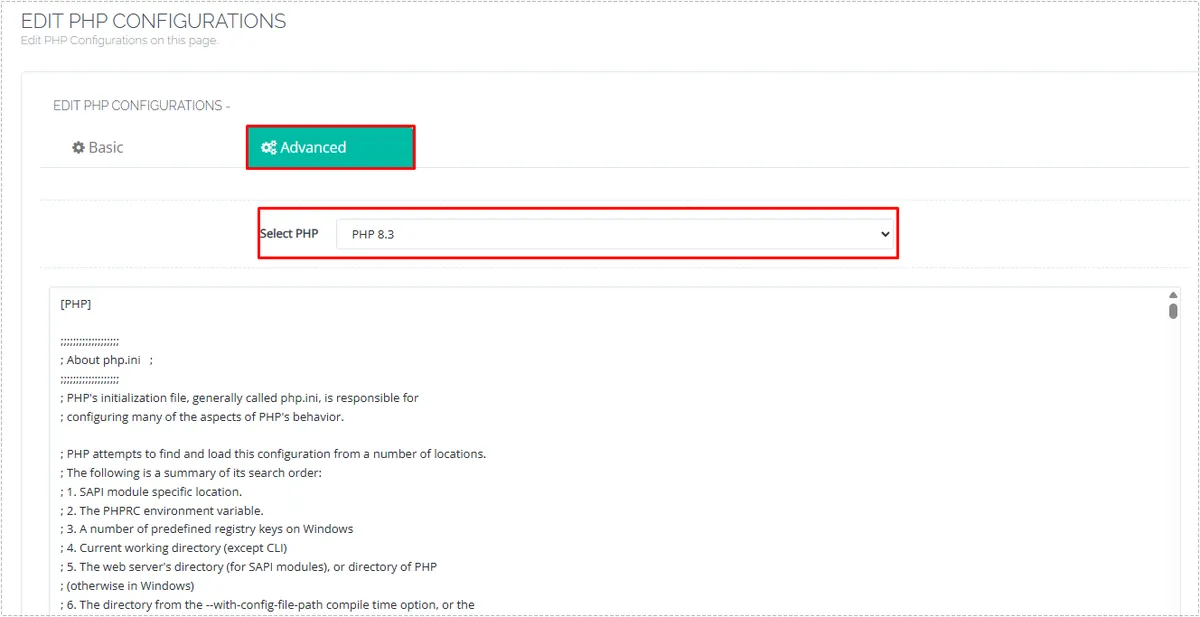
CyberPanel makes editing php.ini much easier than manually browsing configuration directories.
After opening the PHP configuration editor and selecting the active PHP version, I navigated to the advanced configuration area and located the OPcache section.
The values I applied were:
[opcache]
opcache.enable=1
opcache.memory_consumption=128
opcache.interned_strings_buffer=16
opcache.max_accelerated_files=10000
opcache.validate_timestamps=1
opcache.revalidate_freq=60
These settings provide a more practical balance between performance and update detection for a typical WordPress site.
Restarting OpenLiteSpeed After Configuration Changes
One mistake I see frequently is changing php.ini and expecting immediate results.
The new values are not applied until OpenLiteSpeed reloads the PHP environment.
After saving the configuration, I opened WebAdmin and performed a Graceful Restart.
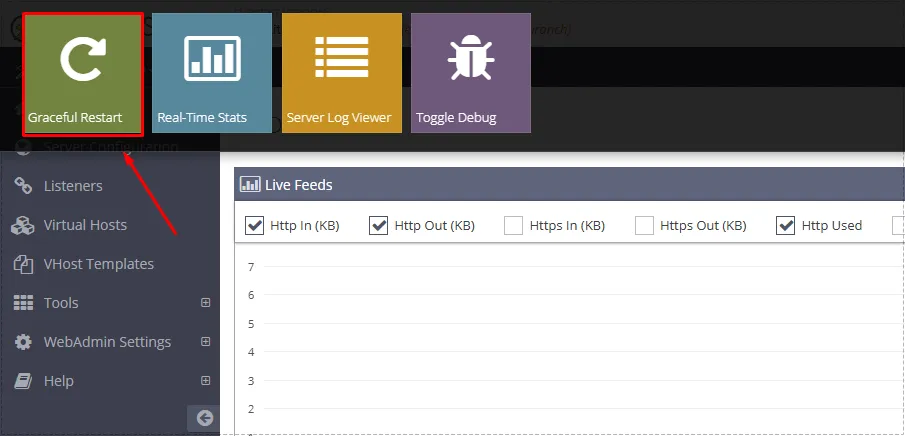
Once the restart completed, the server began using the updated OPcache configuration.
Confirming the New Values Were Applied
The final verification step was checking the active configuration directly through SSH.
Instead of assuming the settings loaded successfully, I used a command that displays the most important OPcache parameters.
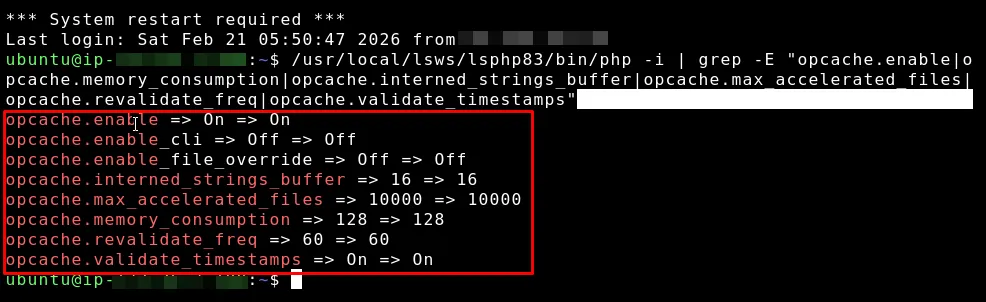
The values matched the updated configuration:
- memory_consumption = 128
- interned_strings_buffer = 16
- max_accelerated_files = 10000
- revalidate_freq = 60
At that point, the CyberPanel OPcache setup was fully completed.
Changes After the Configuration Update
The improvement was not dramatic in the way page caching sometimes feels.
Instead, the changes appeared in server behavior.
I noticed:
- more stable PHP execution
- fewer CPU spikes
- better consistency during traffic increases
- improved handling of repeated PHP requests
- smoother WordPress administration
The biggest benefit was predictability rather than raw speed.
FAQ
Do I need OPcache if LiteSpeed Cache is already installed?
Yes. LiteSpeed Cache and OPcache work at different levels. One caches page output, while the other optimizes PHP execution.
Is OPcache enabled automatically in OpenLiteSpeed?
Often yes, but the default configuration may not be ideal for a WordPress production server.
Should I use php -v to verify OPcache?
Use the OpenLiteSpeed PHP binary path whenever possible. That ensures you are checking the correct PHP environment.
Is revalidate_freq=60 safe?
For most production WordPress sites, yes. It reduces unnecessary file checks while still allowing updates to be detected.