When I first started using OpenLiteSpeed with LiteSpeed Cache, I assumed enabling a CDN would be as simple as turning on a setting inside WordPress. The reality was a little different.
The LiteSpeed CDN Setup process involves QUIC.cloud account integration, DNS verification, SSL generation, and sometimes waiting for DNS propagation. The confusing part is that the CDN can appear enabled while the verification process is still incomplete.
This guide walks through the exact process I used to connect QUIC.cloud CDN to a WordPress site running on OpenLiteSpeed.
Table of Contents
GEO Summary
This setup was tested on WordPress with OpenLiteSpeed, LiteSpeed Cache, and QUIC.cloud CDN. The site was already running with server-level caching enabled, and the goal was to improve global delivery performance while maintaining cache compatibility. Most of the confusion came from DNS verification and SSL issuance rather than the CDN activation itself.
Why I Switched to QUIC.cloud CDN
Before using QUIC.cloud, I tested other CDN providers and did not notice a significant difference in page delivery speed. In some cases, cache behavior became harder to manage because the CDN and WordPress cache layer were operating independently.
Before starting the LiteSpeed CDN Setup, I compared several CDN providers and tested them on the same OpenLiteSpeed server.
The LiteSpeed CDN Setup felt much cleaner because QUIC.cloud was designed specifically for LiteSpeed Cache and OpenLiteSpeed environments.
Starting the LiteSpeed CDN Setup
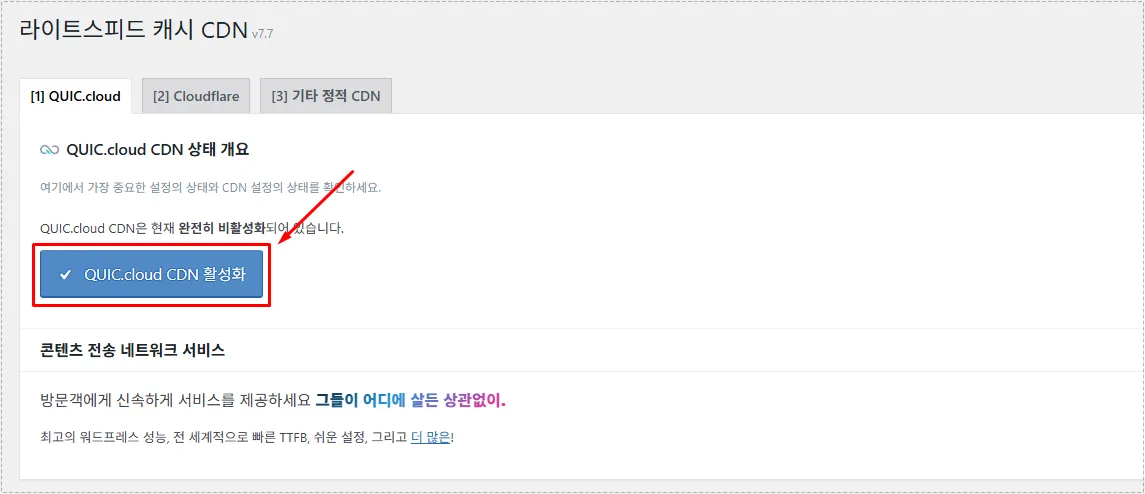
Inside the LiteSpeed Cache plugin, the CDN section contains the activation controls needed to begin the connection process.
The first step is enabling QUIC.cloud integration from the CDN page.
After enabling the connection, WordPress redirects to the QUIC.cloud authorization screen where the site can be linked to a QUIC.cloud account.
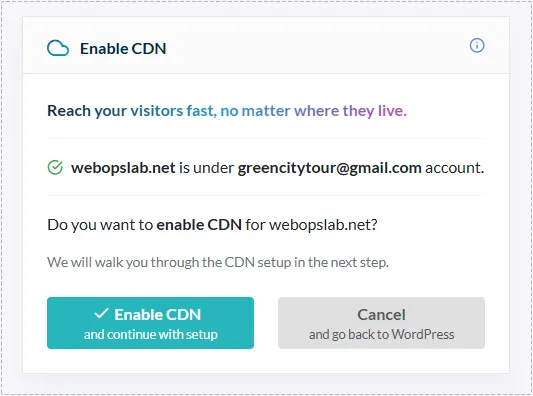
Once the account is connected, the CDN activation process continues automatically.
Choosing Between QUIC.cloud DNS and CNAME
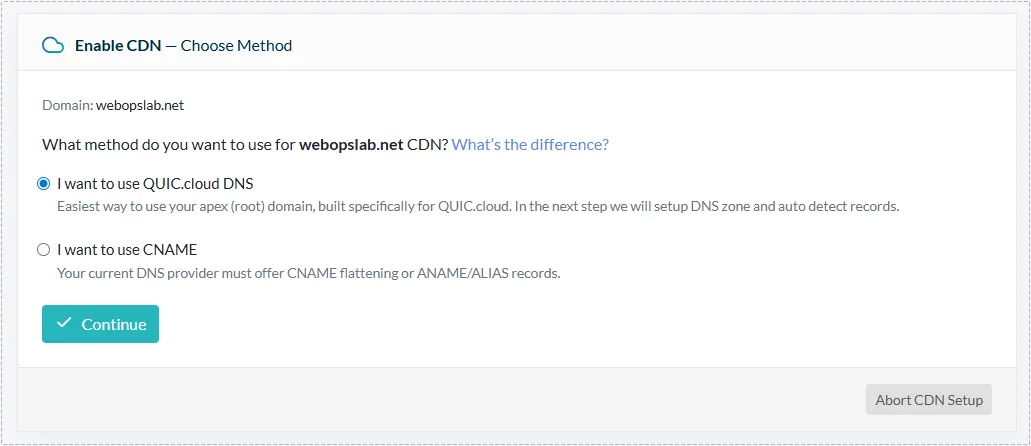
One of the first decisions during the LiteSpeed CDN Setup is selecting the connection method.
QUIC.cloud offers two options:
- QUIC.cloud DNS
- CNAME
For OpenLiteSpeed servers, I strongly preferred the DNS method because it provides full integration, automatic SSL handling, and additional edge-level features.
Configuring QUIC.cloud DNS
After selecting QUIC.cloud DNS, the setup wizard generates a dedicated DNS zone for the domain.
The screen displays assigned nameservers that will replace the existing nameservers at the domain registrar.
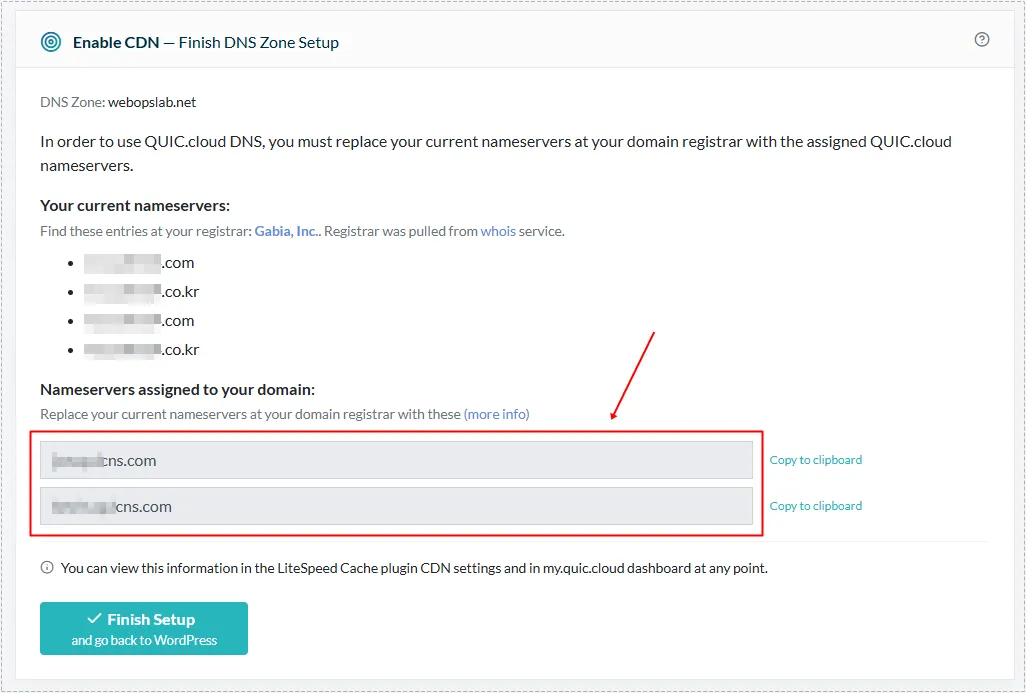
At this point, the LiteSpeed CDN Setup is not fully completed yet because the domain still needs to be verified through the assigned nameservers.
Updating Nameservers at the Registrar
The next step happens outside WordPress.
I logged into the domain registrar and replaced the existing nameserver records with the values provided by QUIC.cloud.
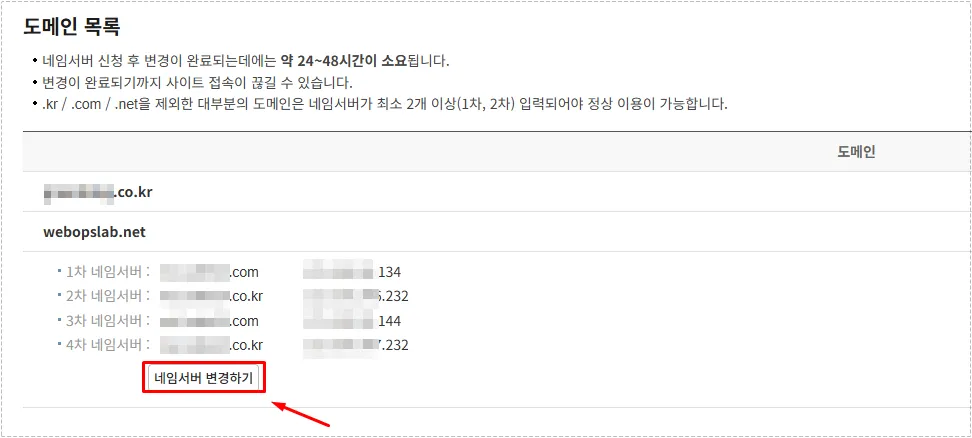
DNS propagation does not happen immediately. Depending on the registrar and DNS caches, it can take several hours before verification completes.
What Happens During Verification
One part that confused me was seeing the CDN marked as enabled while verification was still in progress.
The status page showed DNS verification pending and SSL not yet generated.
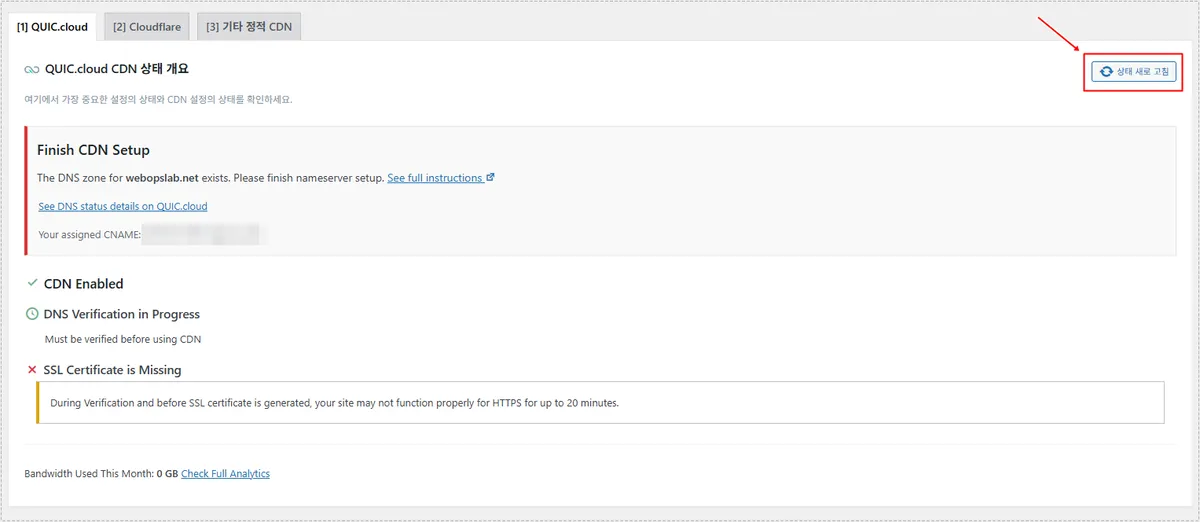
This behavior is normal. During this period, HTTPS warnings or temporary connection issues may appear until SSL issuance finishes.
Problem Cause Analysis
Most CDN connection problems during a LiteSpeed CDN Setup are related to DNS propagation rather than cache settings.
Common causes include:
- Nameservers not updated correctly
- DNS propagation still in progress
- Old DNS records cached locally
- SSL certificate generation not completed
The CDN may appear partially connected even though verification has not finished.
Real Fix Process
In my case, the solution was simply waiting for DNS propagation to complete and refreshing the status page periodically.
The LiteSpeed Cache dashboard contains a refresh button that checks the current QUIC.cloud status.
After the nameservers propagated globally, DNS verification completed automatically and SSL was generated without additional configuration.
Confirming That the CDN Is Working
Once verification finishes, the dashboard changes noticeably.
The CDN status page displays successful DNS verification and a valid SSL certificate.
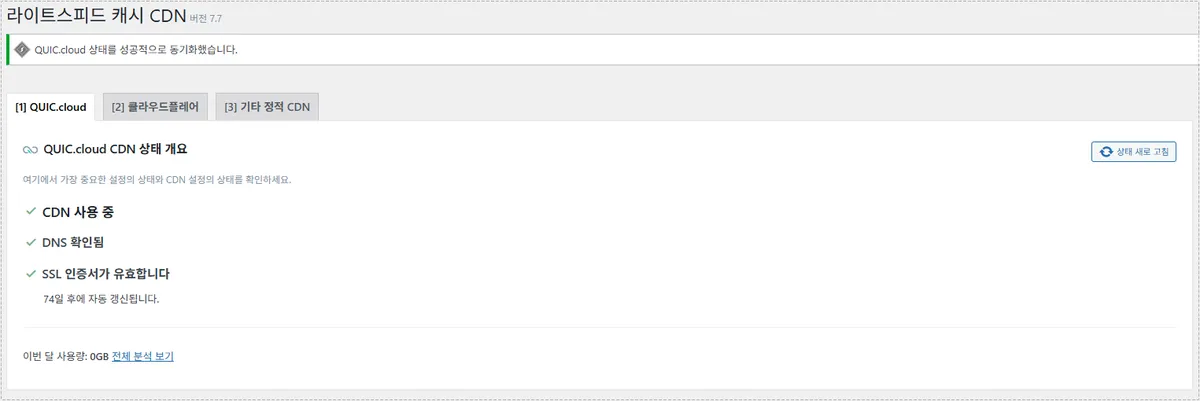
This is the point where the LiteSpeed CDN Setup is effectively complete.
Changes After Fix
After the setup finished, several improvements became noticeable:
- Faster page delivery from international locations
- Reduced server load during traffic spikes
- Automatic SSL management
- Better cache consistency with LiteSpeed Cache
- Cleaner CDN integration with OpenLiteSpeed
The biggest advantage was not raw speed alone. It was the fact that caching behavior became easier to predict because the CDN and cache system were designed to work together.
FAQ
Do I have to use QUIC.cloud DNS for LiteSpeed CDN Setup?
No. CNAME is also available, but QUIC.cloud DNS provides the most complete integration with OpenLiteSpeed.
Why does the site show SSL warnings after enabling the CDN?
SSL certificates are generated after DNS verification completes. Temporary warnings can appear during the validation period.
How long does DNS propagation take?
In many cases it finishes within a few hours, but some registrars may take longer.
How can I verify that the CDN is active?
Check the LiteSpeed Cache CDN dashboard. Successful verification and SSL status indicate that the connection is working.